I am Karen Pérez Guzmán, a Mexican photographer who’s traveled far from home to the northern lands of the world with my camera under my arm – both as a way of getting work and money, and a way to enjoy and see life differently.
Photography is something I have wanted to do ever since my father got me my first film camera when I was 10 years old. Back then you only had 36 shots in a film, 36 opportunities to capture memories, or 21 if you didn’t have sufficient money to buy the 36 shots film, which sometimes was the case. I’ve studied photography in my homeland Mexico, as well as in Italy and England, and now I practice it professionally here in Stockholm.
Camera Diaries is a special corner you and I will share, where I am going to give you my tips and advice – and share my photo-session stories. Just share your passion and interest in photography with me in return and we’re going to have a lot of fun.
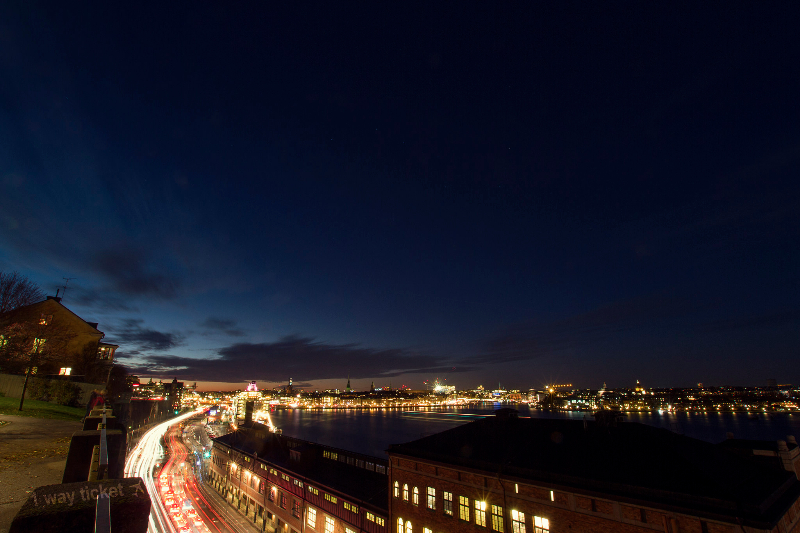
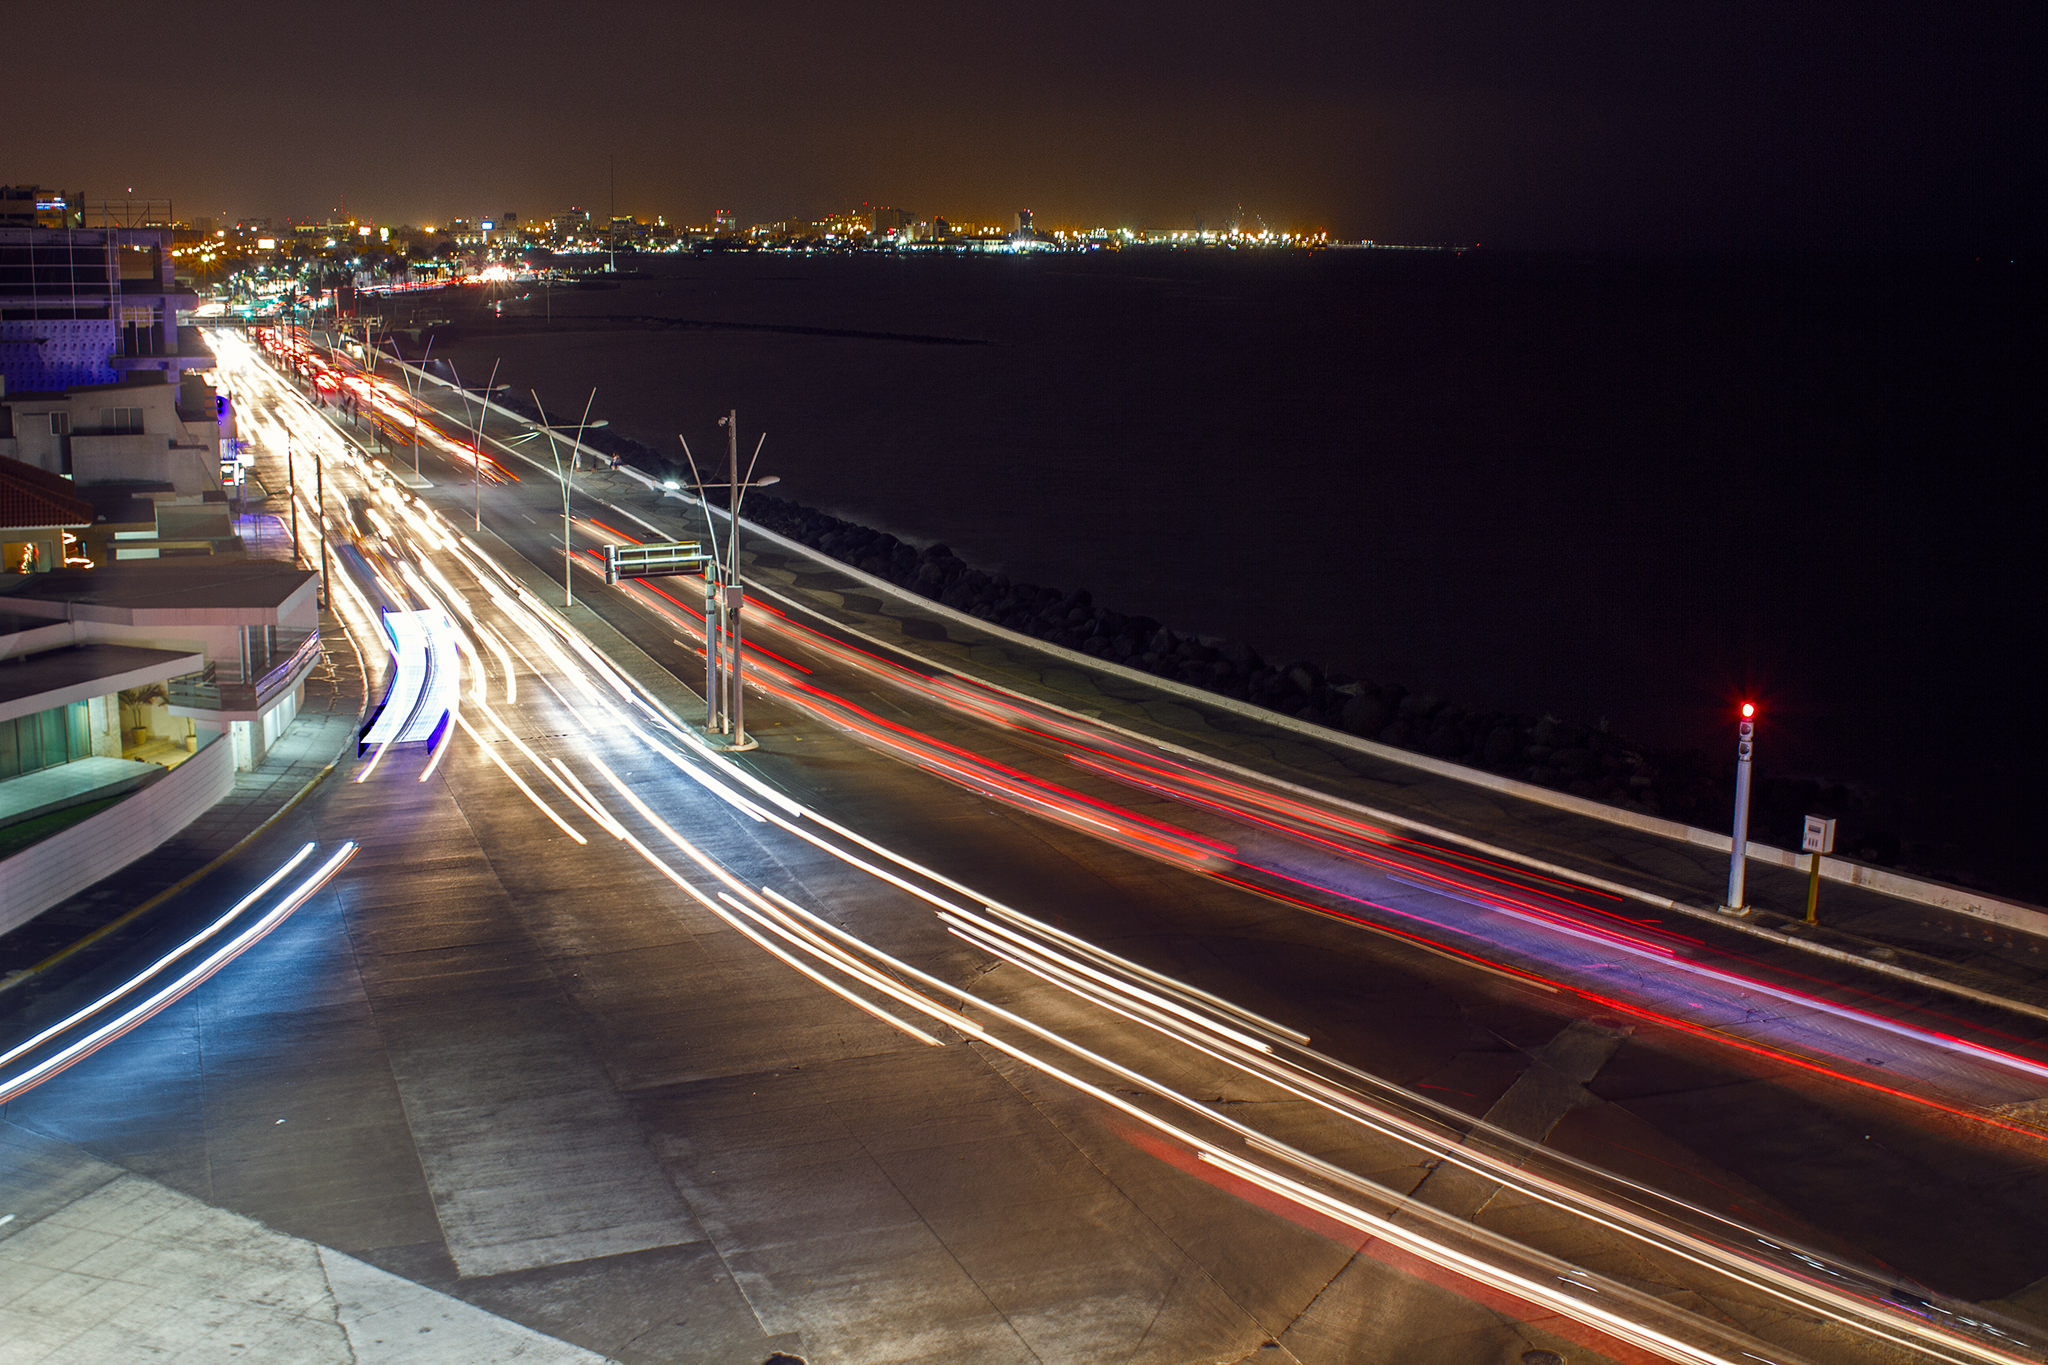
In this first written episode, if I may call it that way, I want to tell you how I created the image you see at the top. It is actually very simple and it has not been manipulated in Photoshop at all. The effect of the lines of the cars moving as they pass through the road is called light trail and it’s created by a long exposure in my camera. It basically means that I clicked the shutter of the camera, to take the photo, and I set up the speed in which the shutter opens and closes so slow, that all the elements that were moving in front of me became blurred and the elements that were fixed looked extremely sharp.
(The settings that I used for the image you see at the top were: Shutter speed 3″2, F/6.3, ISO 200)
The first thing to make this photo happen is to have your camera on a tripod or place it on a flat surface where it will not be moved by anything at all. Why is this important? Well a long exposure photo is typically a photo where you have to set up the shutter speed to anything more than 10 seconds or so. Most typical shots of waterfalls or lakes where running water is blended to give the creamy, cloud like effect, for example, have exposure times of over a minute, whereas images of star trails in the night sky will have exposure times starting from 5 minutes.
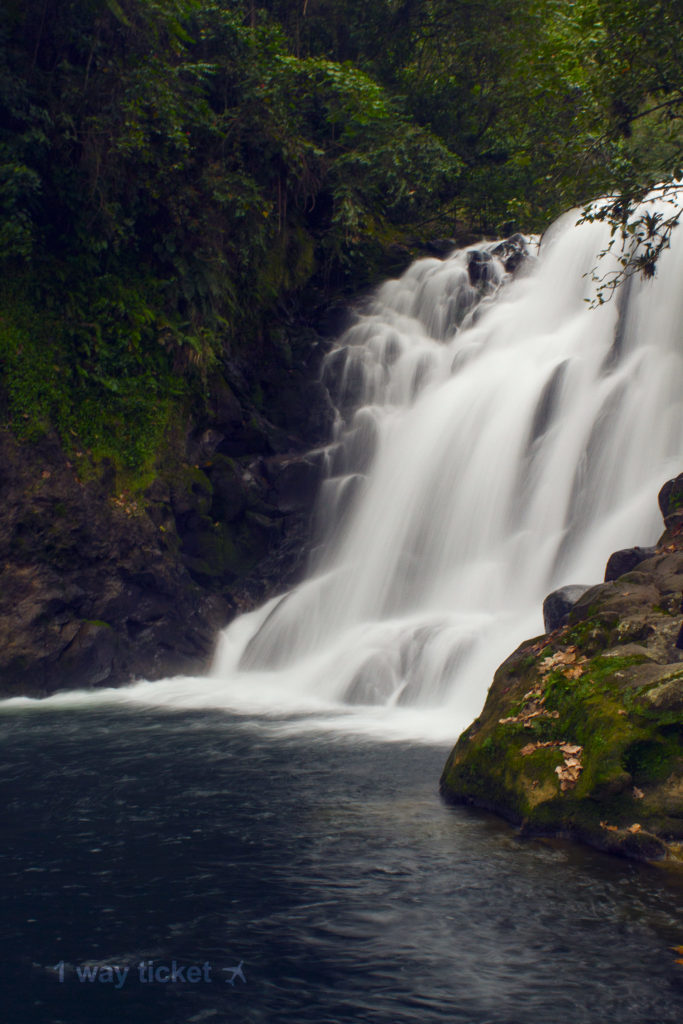
Because of the long shutter speed, the camera will record every movement and every element that comes in front of it in the time frame set. So if anything happens to move or shake the camera, it would cause blur in the image itself and perhaps ruin your photo. So make sure it is steady.
Setting up your camera is of course going to be trial and error, you will never get a perfect photo on the first attempt.
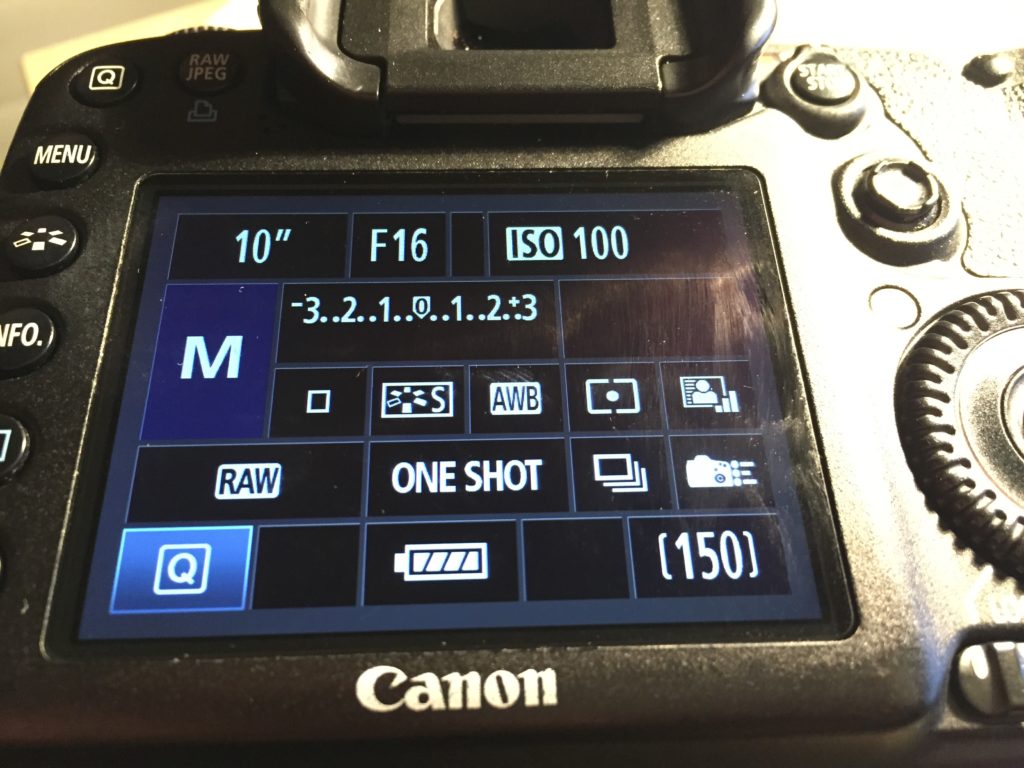
Wherever possible, shoot at the lowest ISO possible, like 100-250. This will help you get a very clear image with very little noise. Use manual focus and set the focus to infinity on your lens, if you try using the auto focus, the camera will most likely struggle a bit finding a focus point.
Use a high aperture, of F/11-F/22 for example. This will give you the maximum amount of area into focus and will be key for you to also be able to use a slow shutter speed.
Start with setting the shutter speed as slow as 3″ if there is a lot of light in the area you’re photographing and go from there to slower or faster shutter speeds, taking more and more photos until you find the desired effect.
If the shot gets too dark and underexposed, compensate the exposure lowering the shutter speed to 5″ or 10″, or increase your ISO. If a shot is too light, do the opposite.
One tip that is going to come very handy is to set your camera on Self Timer, because even pressing the shutter on your camera will move the camera slightly, enough to unintentionally blur a shot. Typically the 2 second timer is quite enough to press the shutter and remove any unwanted movement, but most cameras have a 10 second timer too.
You must know that when doing a long exposure photograph there needs to be very little light for you to be able to have a slow shutter speed. If you want to try doing a long exposure photo when there is day light, you would have to use a filter that covers the lens of your camera and reduces the amount of light going into it.
For those who know a bit more about photography and have one or two gadgets in their camera bag, I would recommend to use a remote trigger ant try doing shots with a bulb instead of the camera’s predetermined speed. Why? Because you don’t know how long it will take for an element to move in the area you’re capturing. If you’re shooting fireworks for example, you may want to capture from the moment you see the light trail as it’s going up, until the explosion. Only your eye can say when to start the capture and when to finish it.
So try to start going out at night and find a cool place with lots of movement so you can start practicing and just have fun. Once you achieve your first light trail shot, you will be amazed at how far your imagination will take you on your next one.
Want to ask me a question or just get in touch? I’ll be happy to help you.
Website: www.1-way-ticket.com
Facebook: 1 way ticket video & photo
Instagram: 1_way_ticket_photo_video





2 Comments